 by Ecrin Labs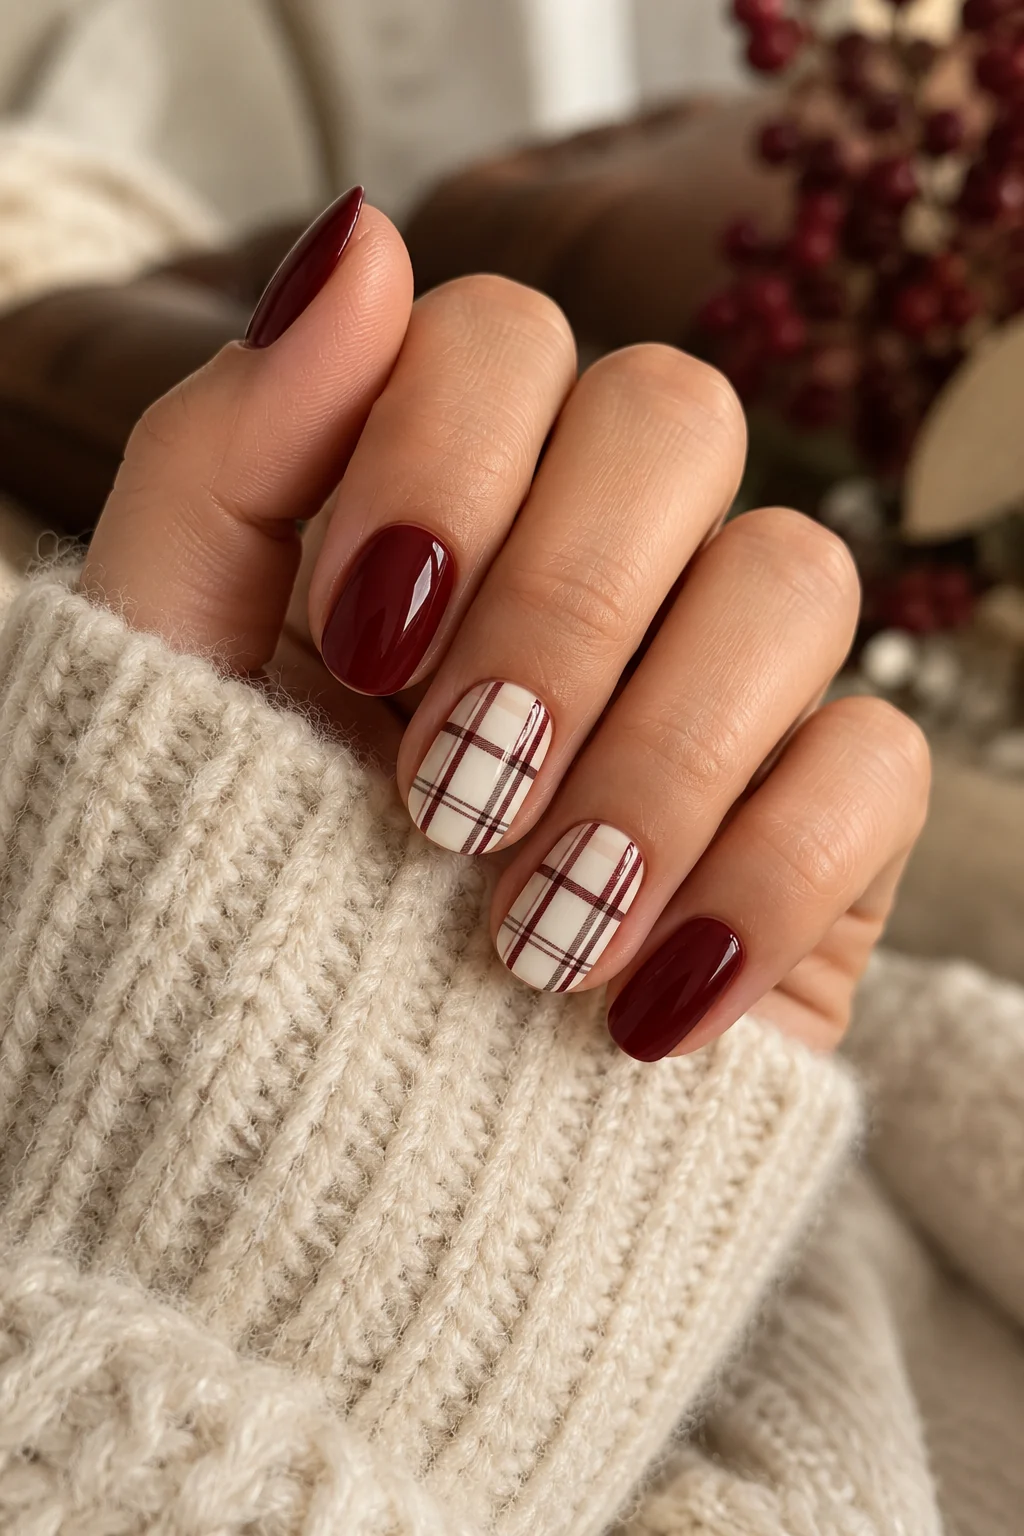
A plaid manicure works best when the lines have a clear hierarchy. Choose one base color, one broad stripe color and one fine-line accent. You do not need an exact fabric tartan: a small, readable arrangement is more effective on a curved nail.
Begin with one or two accent nails, as shown in the first three illustrated examples. The additional variations change the palette, stripe placement or amount of pattern. Practice the grid on a spare tip or paper before painting your hand.
1. Burgundy and cream accents
Paint most nails glossy burgundy and leave two cream accent nails for the grid. Add a broad burgundy stripe and a thin crossing line. Keeping the pattern on just two nails makes it readable on short oval shapes.
2. Cocoa and beige checks
Start with beige and use milk chocolate for the main horizontal and vertical bands. Add a fine darker line beside one band to create depth. Match the remaining nails to the milk-chocolate shade rather than adding a fourth color.

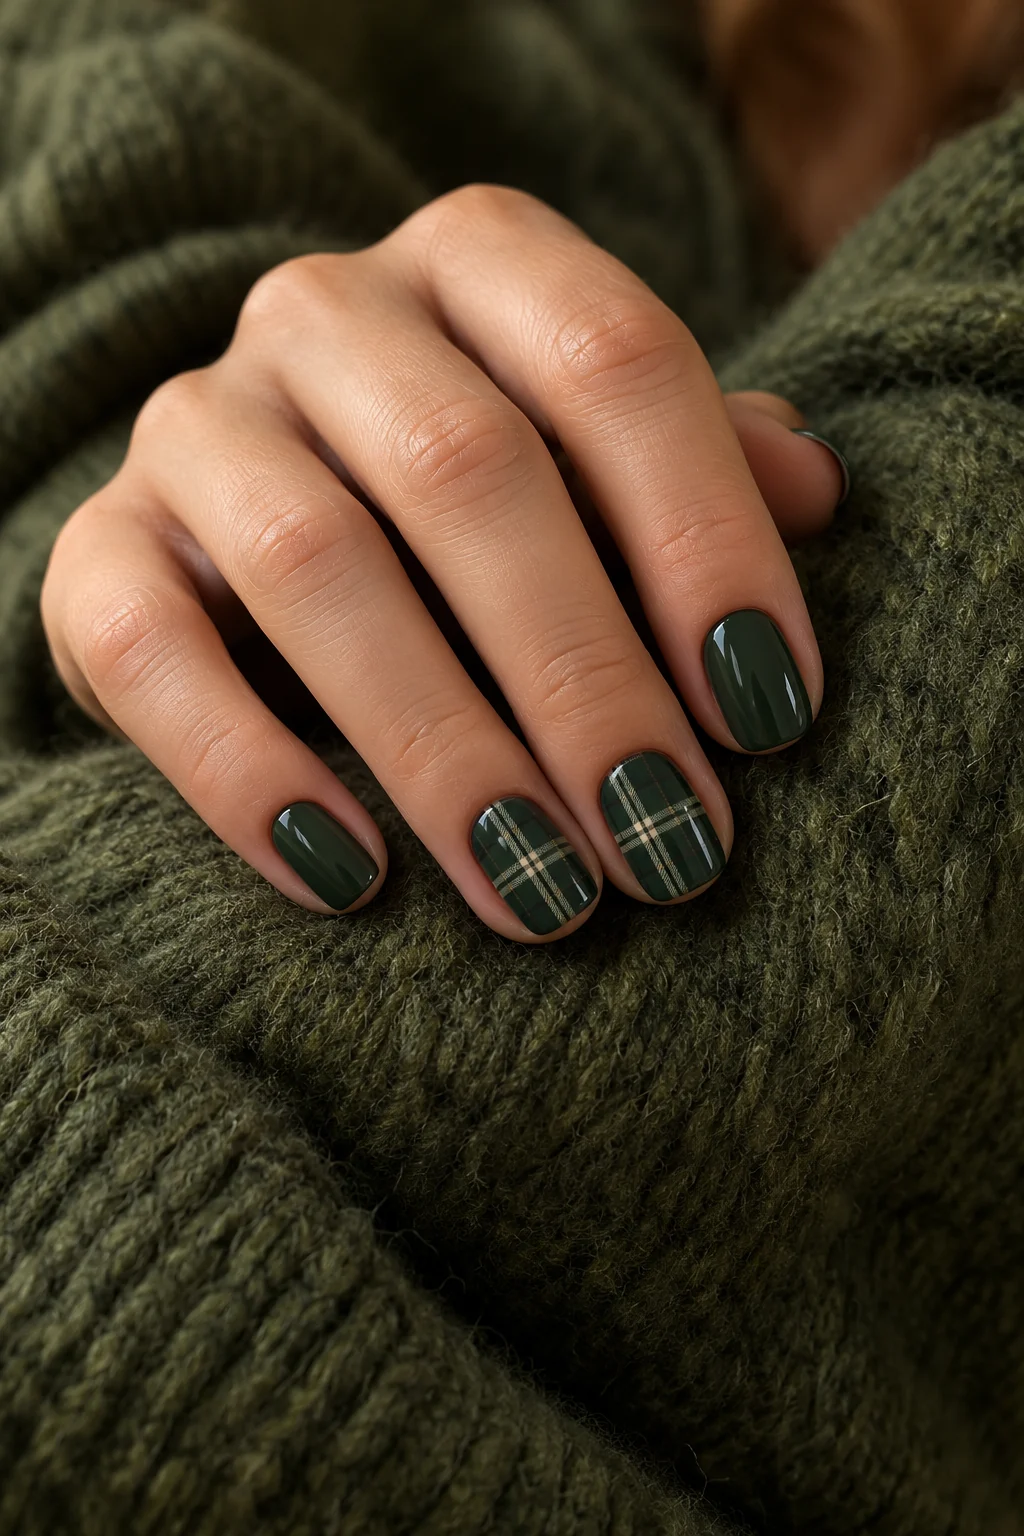
3. Forest green and cream plaid
Use a cream base for two accent nails and forest green on the others. Cross two fine green stripes with a slightly wider band. Leave a clear margin near the cuticle so the pattern does not look crowded.
4. A fine taupe windowpane
Draw evenly spaced taupe lines on an ivory base, keeping every stroke similar in width. This is closer to a windowpane check than a layered tartan. Its simplicity makes it a good practice design before adding multiple stripe widths.
5. A single plaid ring finger
Keep nine nails in one solid color and use the ring finger as the patterned detail. Repeat that solid shade inside the grid. The result feels connected even when the accent has a lighter base.
6. Plaid French tips
Restrict the grid to a wide tip area and keep the lower nail sheer. Paint the tip background before adding the crossing stripes. This is easier on a little more length; on very short nails, use one full accent instead.
7. Rust and cream with a dark line
Use muted rust for broad bands and a narrow espresso line for contrast. Avoid pure black if you want a softer palette. A cream base leaves enough brightness for the overlapping colors to remain distinct.
8. A diagonal check
Rotate the direction of the crossing lines so they form diamonds across the nail. Keep the angles consistent and start from a central crossing point. This is more forgiving when used on one nail instead of an entire set.
9. Navy and warm beige
Pair a beige base with navy stripes and one very fine cream highlight. Keep the blue deep and slightly muted for an autumn feel. Finish the other nails in navy to frame the lighter pattern.
10. A sheer negative-space grid
Use a clear or sheer pink base and two thin brown crossing lines. Allow plenty of space between them. The nail’s natural appearance becomes part of the design and keeps the finish lighter than an opaque plaid.
11. A matte plaid accent
Use a compatible matte top coat on the patterned nails and a glossy finish on the solid ones. Let the grid dry first to avoid dragging the lines. Test the matte product because it can change the contrast between colors.
12. A tiny metallic crossing
Complete a brown-and-cream plaid, then add one fine gold crossing line. Keep metallic polish away from every other intersection. A single glint provides detail without turning the grid into a glitter-covered surface.
Frequently Asked Questions
How many colors do I need?
Three are enough: a base, a stripe color and a fine accent. Start with two if you are learning to control line spacing.
Can I do plaid on short nails?
Yes. Use fewer lines and one or two accent nails. A fine windowpane design is often easier to read than a dense tartan.
What helps make the lines straight?
Support your painting hand, turn the finger as needed and use a small liner brush with very little polish. Let each layer dry before crossing it with another color.
 15 Minimal Halloween Nail Ideas for a Subtle October Manicure
 12 Brown French Tip Nail Ideas from Espresso to Caramel
 12 Deer Print Nail Ideas in Brown, Cream and Caramel